Energy Measurement Infrastructure
As part of the MAGEEC we need an energy measurement infrastructure for a couple things: taking measurements for the machine learner to train on, and measurements to evaluate the decisions that the machine learner has made. Furthermore, we want to be able to do this over many platforms, with minimal human interaction and in a convenient way. This leads to the creation of a hardware platform, and a software framework to support it and that allows for easy interaction with the board.
The energy measurement board
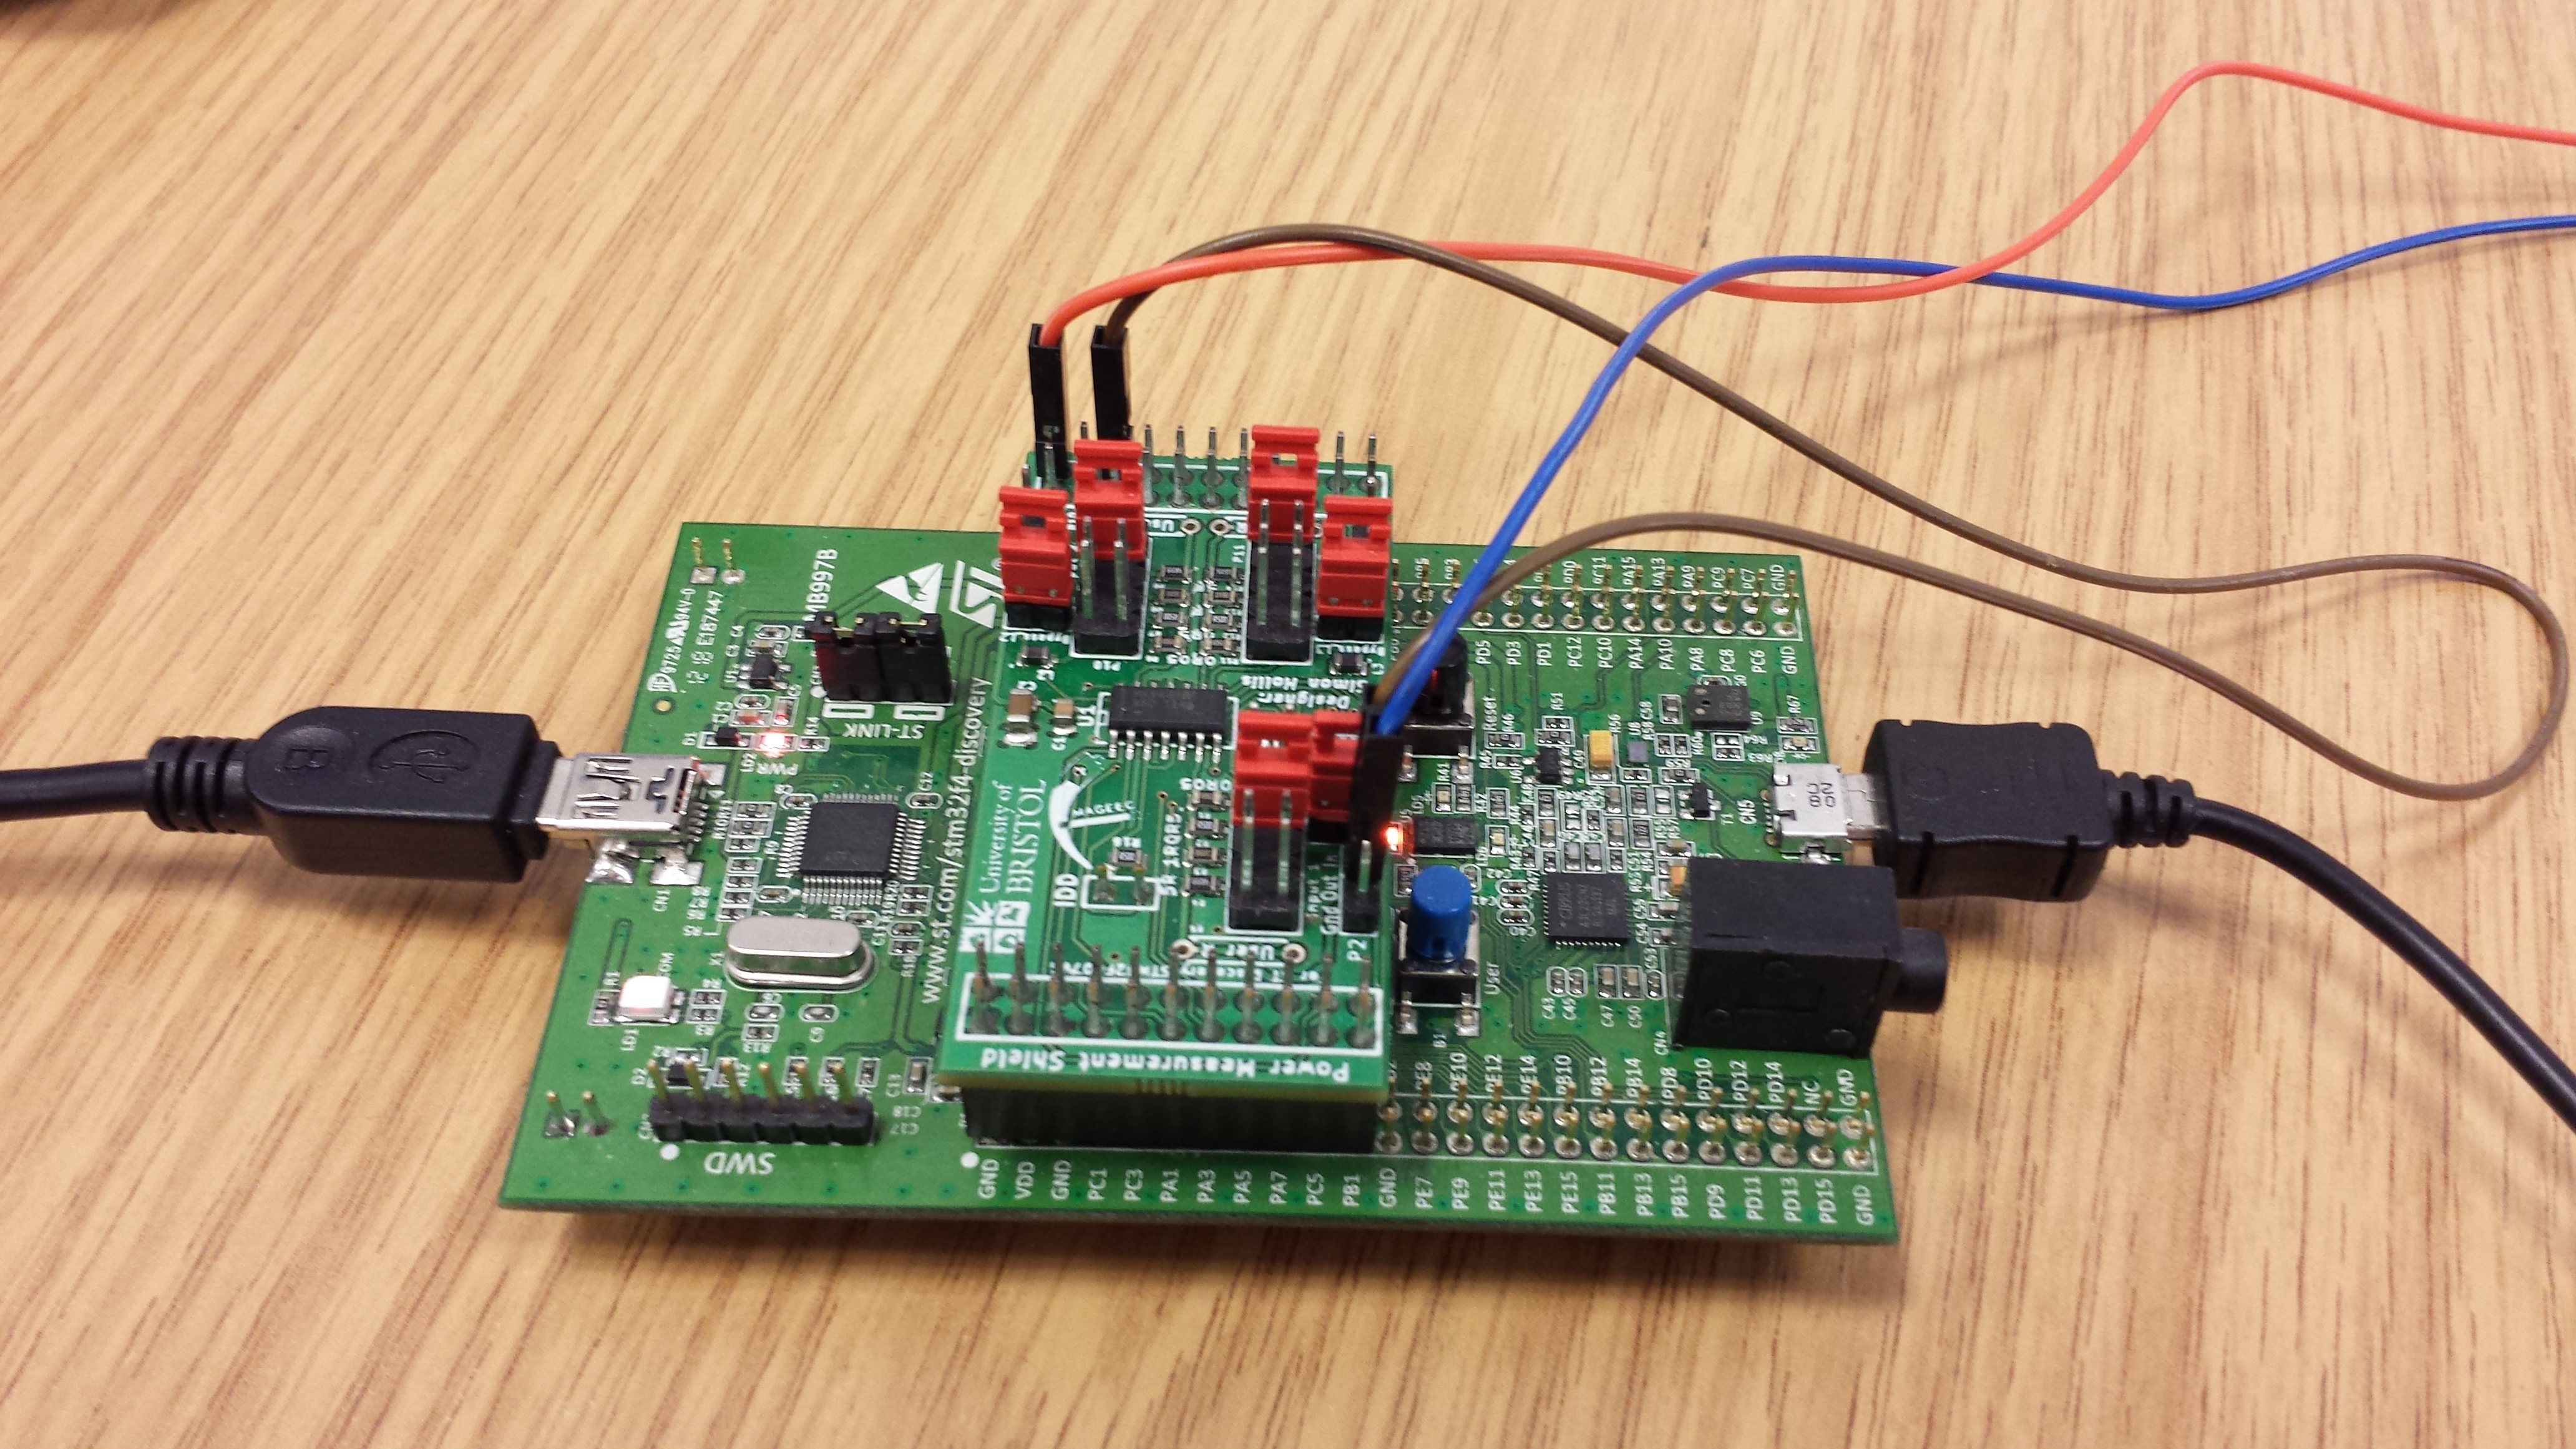
The energy measurement board has been designed as part of the MAGEEC project and to be low cost, open-source and easy to use. It consists of a small shield which connects to a STM32F4-DISCOVERY board and which performs the energy measurements.
The shield itself attaches to the target board — the board you want to measure — by 3 wires, to one of the measurement points; these wires connect the grounds together and intercept the power supply. There are 3 measurement points in all, allowing you to take 3 independent measurements simultaneously.
The energy measurement board is plug and play, communicates over USB, should work on any Linux-based system and a member of the community has documented how to use it with Windows.
Features
The board can take up to three measurements simultaneously, each at 2,000,000 samples/second. These are accumulated on-board the STM32F4, into various statistics, such as energy, time, average power, average voltage and average current. Each measurement point can be triggered independently, allowing a program to accurately start and stop the energy measurement.
A range of target devices can be measured with the board, due to the selectable resistors and inductor. Each resistor configures a different current range, from 2µA-10mA to 240µA-1A. For more powerful devices, the inductor allows the measurement board to be inserted into a switched-mode power supply.
The framework
The framework itself consists of a set of python modules to communicate with the board. The main module for this is pyenergy, and can be installed using pip:
    sudo pip install --pre pyenergy
    # Note you may need to do "sudo pip install --upgrade pip" if you have an old version of pip
The python module provides both scripting and command line interfaces, allowing the boards to be used both interactively and for batches of measurements. The command line interface is accessed by using the command ‘energytool’
    $ energytool
    Usage:
        energytool (-m MPOINT)... [options] read SERIAL PIN
        energytool (-m MPOINT)... [options] continuous SERIAL
        energytool (-m MPOINT)... [options] debug SERIAL
        energytool list
        energytool setup
        energytool changeserial SERIAL NEWSERIAL
        energytool interactive SERIAL
These commands allow various interactions, such as reading energy measurements, continuously taking measurements, listing the connected energy monitors, etc. For example, the energy monitor boards connected to the PC can be listed:
    $ energytool list
    Connected energy monitors:
        Serial API
        CXM3 10
Then once the serial number is known, the energy measurements can be continuously read (from measurement point 1):
    $ energytool -m 1 continuous CXM3
    time, energy_1, power_1, avg_current_1, avg_voltage_1,
    0.00022619047619 3.29799771309e-06, 0.0145806214684, 0.00473607113487, 3.07863898026,
    0.100547619048 0.00146438089779, 0.0145640534472, 0.00473300624001, 3.07712438765,
    0.200833333333 0.00292506114747, 0.0145646198214, 0.00473295878177, 3.07727497962,
    ...
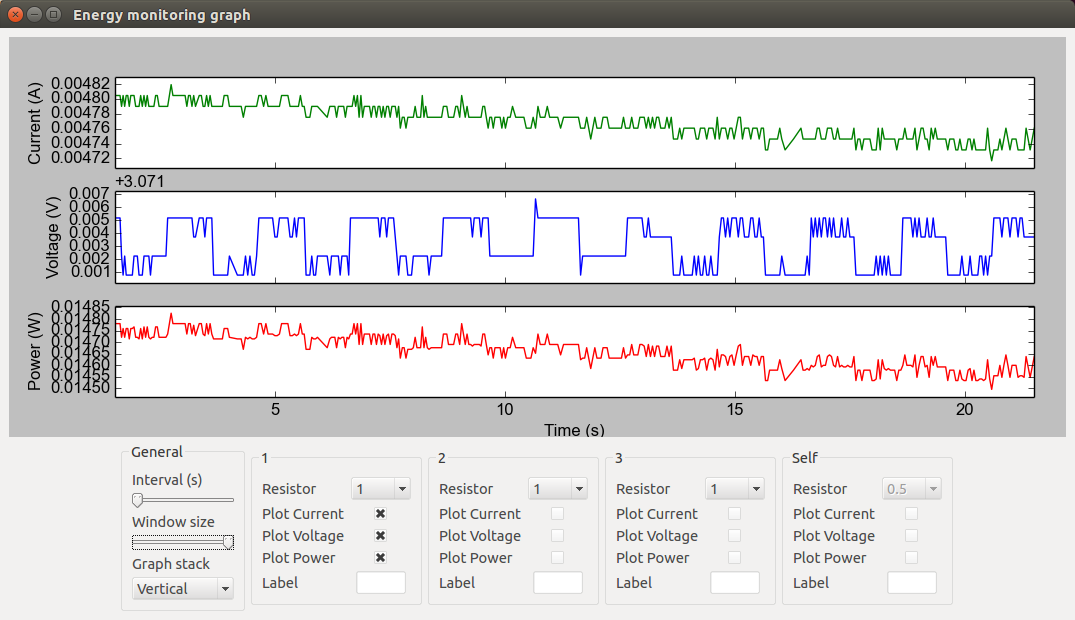
The final command-line option displays an interactive GUI to graph the current energy usage of each measurement point (note this requires PyQt4 to be installed).
$ energytool interactive CXM3
The scripting interface is similarly simple to use:
    import pyenergy

    # Specifying the serial number of the board
    em = pyenergy.EnergyMonitor("EE00")

    # Use measurement point 1
    em.enableMeasurementPoint(1)
    em.startMeasurement(1)
    ...
    em.stopMeasurement(1)
    print em.getMeasurement(1)
Problems & the future
There are infrequent cases where the board will crash. This sometimes seems to happen if the USB works itself into an inconsistent state. If a failure happens, a solid blue light will be displayed on the board. Currently this requires a hard-reset of the board, but eventually the board will reset itself and signal the error to the host.
In future it would be nice to have a real-time tracing feature — somehow store/transmit the power traces, rather than accumulating the energy on board. This is limited by the speed of the full-speed USB, and the small amount of RAM on-board the chip.
Another nice feature would be multiple triggers, enabling profiling of different parts of a program. The target board could be hooked up to the measurement board by a few extra wires, which signal which part of the program has just been entered. This could lead to an ‘eprof’ — function level energy profiling.
What they are being used for
The training phase of the MAGEEC project needs lots of data on which compiler optimisations reduce or increase energy consumption. These boards are currently being used on a range of embedded platforms to gather this data. Once we have a fully working version of MAGEEC, the boards will be used to test out the predictions MAGEEC makes.
I use the boards extensively in my own research. The first version of the board was used in a study of compiler optimisations. Most recently I’ve been using the measurement boards to explore the energy consumption of flash memory.
The boards are also being used for several student projects at the University of Bristol, ranging from energy of robotics to cryptographic algorithms.
Links
The designs for the boards are on github. The firmware and python libraries are also available. We ran a workshop; this has details on how to get the boards up and running.


")


Trackbacks & Pingbacks